


Tutisduino - An RGB Doorlatch Clone
Project scope
This Computer Science 220 final project had the following requirements:
- Obtain a Freeduino development kit and successfully build the microcomputer.
- Learn the Occam-Pi programming language and design software for the Freeduino
- Using basic electronic parts and I/O devices, create a simple project to demonstrate your acquired programming and hardware capabilities.
Background
Although I have completed many labs and projects during my time attending Allegheny, I can honestly say that this project was one of my all time favorites. During the course of a semester in my Computer Science 220 Programming Language Concepts class, we embarked on a journey to learn as much as possible about different programming languages. We learned how computers run concurrent (only able to compute one thing at a time) and parallel processes (able to compute multiple things at a time), how different languages were developed, the different applications of various languages, and much more. We were introduced to many new languages, learning how to write simple to complex programs in each. All of these languages were concurrent though. The final project of the year introduced us to parallel programming; This is where our hardware project came into play. Although the Freeduino is not capable of true parallel computation, we were given a language that takes parallel programmed code and can execute it on concurrent hardware.
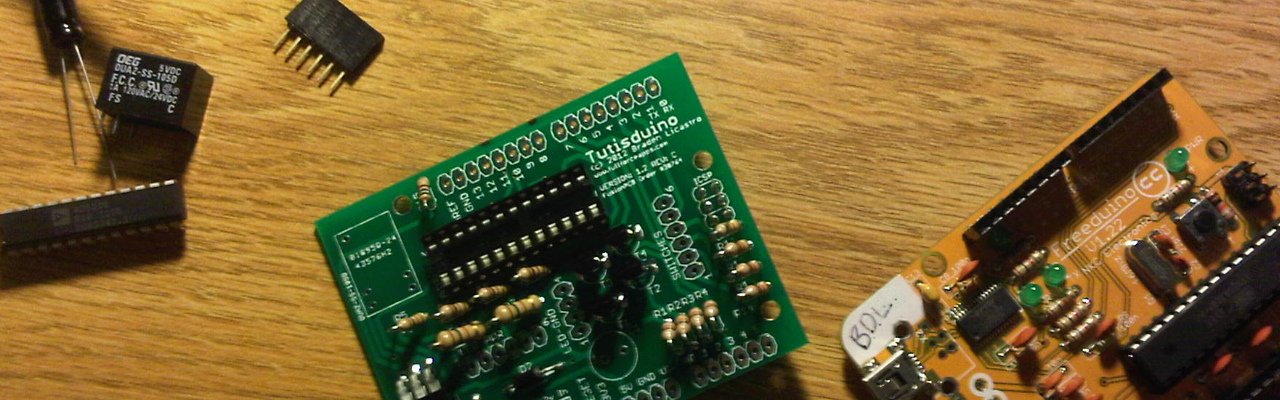
Many of the other students in my Computer Science course decided to keep their projects simple by reading temperatures, PH, and other environmental variables and dumping the output back to the command line through the Freeduino. I, on the other hand, was not happy just playing with existing components and took a risk. I like to think of myself as determined and adventurous. Embarking on a graded project I had no experience with previously, and a limited time schedule was risky but very rewarding! I spent months developing my own circuitry based off of numerous plans I found on the internet. Having no hardware design or electrical engineering experience, this proved very difficult, especially since I accidentally ruined a microprocessor and burned up numerous resistors and LEDs working with the high amperage of the door-lock. After finally getting a handle on the electrical designing process, I was able to finally create hardware capable of opening a high voltage electronic door latch, controlling a 2-d bank of Red, Green, Blue LED lights, and a bank of corresponding buttons. The RGB lights were capable of producing any color I needed and lit the buttons up allowing a color coded combination to be entered. If this combination was correct, it would unlock the door for 5 seconds before closing the latch again. In the event of an incorrect password, 5 additional button presses can be used to correct the error or the keypad will lock you out for 30 seconds.
Project Results
After about $200, months of programming, and developing brand new hardware, I was able to complete a perfectly functional color combination door lock using the Freeduino, an open source alternative to the Arduino. During this process, I learned the programming language Occam-Pi, how to design electronic printed circuits, and even draw them in Eagle. In addition, I also learned how to develop prototypes of the design for testing, and even went as far as having the circuit board printed in China! Let me say, the smell of fresh circuits you created from hand is quite a pleasing scent (though probably cancer causing in the state of California...). Needless to say, I went well beyond the requirements of the project! Take a look below if you want to see the project for itself!


. Quite happy with the outcome!")


, and a key override to hold lock open.")


. Quite happy with the outcome!")


, and a key override to hold lock open.")

